Oh my, if you've ever worked in a deli or restaurant, you know that a Hobart slicer is an absolute lifesaver when it comes to slicing meats and cheeses! But like any equipment with moving parts (I mean, it's inevitable, right?), those blades can get dull over time. And let me tell ya, replacing them ain't exactly rocket science but safety first, folks!
First thing's first - you gotta make sure the slicer is unplugged. Wouldn't want any nasty surprises while we're fiddling with sharp objects. Now here's where some folks might rush; don’t be one of those! Take your time.
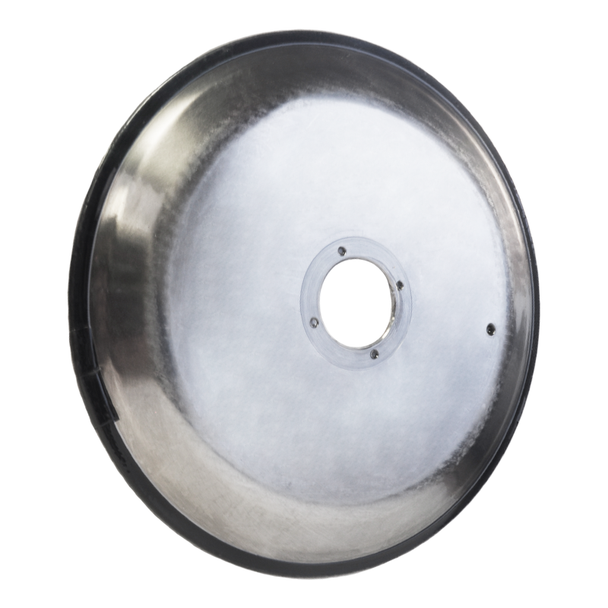
Next up, you'll wanna remove the slicer blade; most models have a nut or screw holding it in place. You’ll need to loosen this (and remember righty-tighty lefty-loosey), so grab the appropriate tool – usually an Allen wrench or a simple screwdriver will do the trick. Don't lose that nut or screw though; they're pesky little things that love to roll away and hide!
Once the blade is free (finally!), lift it off carefully. I can't stress enough how careful you need to be – these blades are sharper than your Aunt Edna’s tongue at a family reunion! Set it aside somewhere safe where it won’t cause any accidents.
Now’s a good opportunity to give everything a good clean 'cause let's face it – bits of meat and cheese aren't going to clean themselves off.
Got your new blade ready? Alrighty then! Place it on the slicer just as the old one came off. Make sure everything lines up properly; there should be no forcing or bending needed (that'd be bad news bears). Securely fasten the nut or screw back on but don't go all He-Man on it; snug is good enough.
Time for some testing – plug that bad boy in and turn her on (but keep your fingers well clear!). If she runs smooth without any wobbles or unusual noises then congrats! You've done yourself a mighty fine job.
And hey, while we’re at it – why not check other parts too? Look for signs of wear and tear on belts and sharpening stones because neglecting those could lead to less than stellar performance from your trusty slicer.
There ya have it - not too hard, right? Just remember: never take shortcuts when dealing with machinery like this 'cause honestly speaking, nobody wants a trip to the ER instead of enjoying perfectly sliced pastrami!
So go ahead and pat yourself on the back for mastering another kitchen task like a pro! Just follow these steps next time your Hobart slicer needs some TLC (which hopefully isn’t too soon), and you’ll keep slicing away safely and efficiently... until next time that is!